

The holidays are a special time of year when families get together to celebrate. One fun tradition is making Christmas ornaments together. Not only will the kids enjoy making them, but they will also be proud to hang them on the tree and show them off to their friends. This blog post will provide some ideas for Christmas ornaments kids can make at home that are both safe and fun!
Christmas Ornaments for Kids
1.Christmas Dough Ornaments
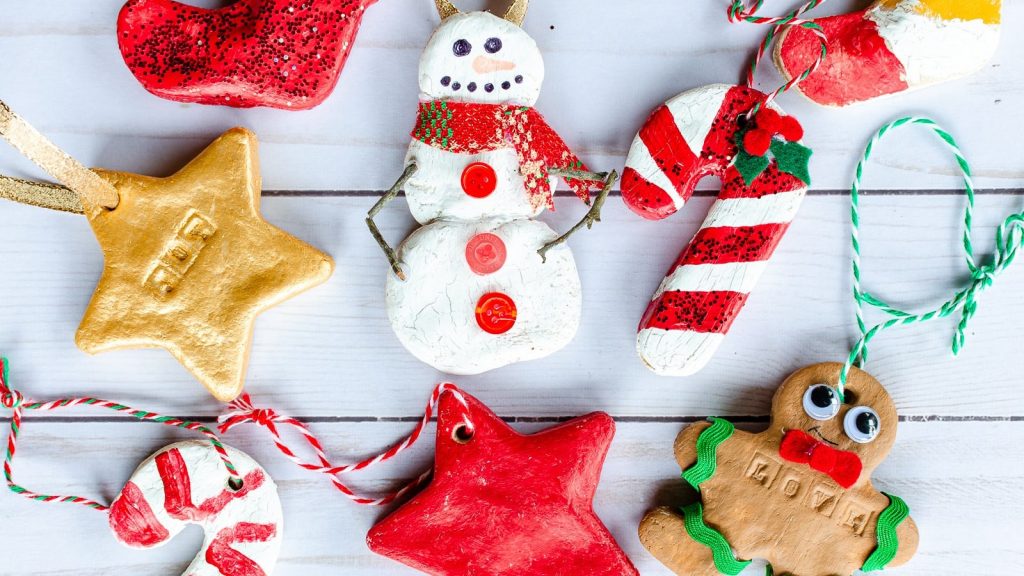
One of the most popular Christmas ornaments for kids to make is dough ornaments. Not only are they easy to make, but they are also safe for little ones to handle. You can make them as simple or as detailed as you want! You will need:
- Air Dry Clay
- Cookie Cutter
- Paint, Glitter, etc.
- String or twine
- Essential oils (optional)
Roll out your clay on a flat surface. Use a cookie cutter to cut out the shape of your ornament. Make a hole at the top of the ornament so you can thread string through it later. Let the ornaments air dry overnight. Once they are dry, you can paint and decorate them however you like! Finally, add kid-safe essential oils for added aroma.
2.Popsicle Stick Photo Ornaments
Another popular and easy ornament for kids to make is a popsicle stick photo frame. They will surely love seeing their faces up on the tree all season long. You will need:
- Popsicle sticks
- Glue
- Photos
- Embellishments
Simply arrange the popsicle sticks in the shape of a frame and glue them together. You can do triangles, stars, and other frames. Once the glue is dry, insert your favorite holiday photo! You can also decorate the frame with glitter, stickers, and other embellishments.
3.Borax Crystal Ornaments
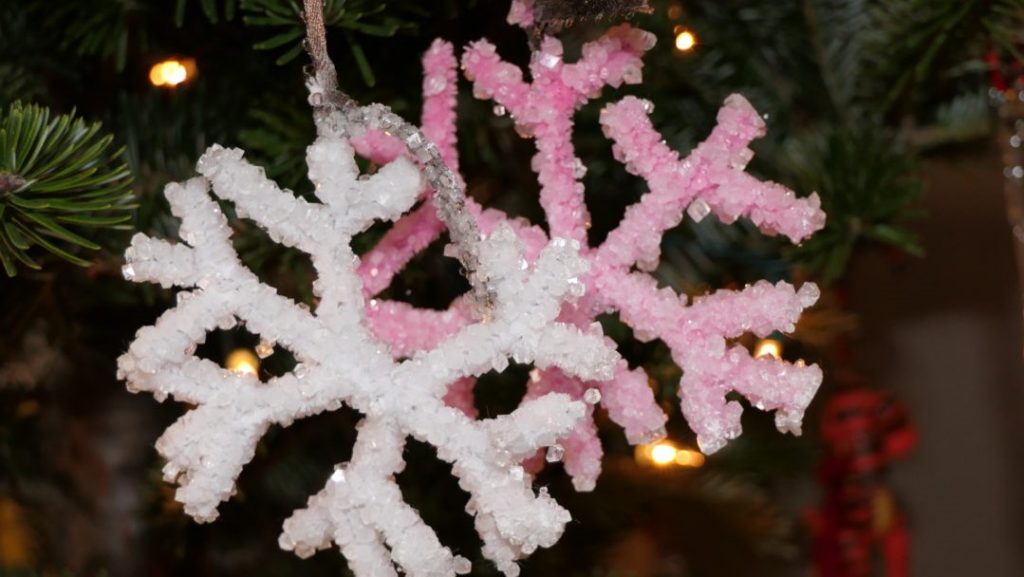
Borax crystal ornaments are not only beautiful but making them also double as a fun science experiment for kids! You will need:
- Glass ornament
- Borax
- Water
- Pipe cleaners
- Pencil
First, make a solution of borax and water. Next, twist the pipe cleaners into any shape you like and dip them into the solution suspending them from a pencil. Let the solution sit and wait for the crystals to form! Carefully remove them from the solution and enjoy your sparkling creation.
4.Sewing Cards Ornaments
Practice your kids’ fine motor skills by having them sew different patterns on colored paper to make this fun and festive Christmas ornament! You will need:
- Colored papers
- Yarn
- Puncher
- Scissors
Start by cutting out different shapes from the colored papers. It can be anything you like snowflakes, etc! Once you have your shape, punch small holes forming different patterns. Now it’s time to start sewing! Give your child a piece of yarn and let them start following the pattern you created. Once they’re done, hang them on your Christmas tree and enjoy!
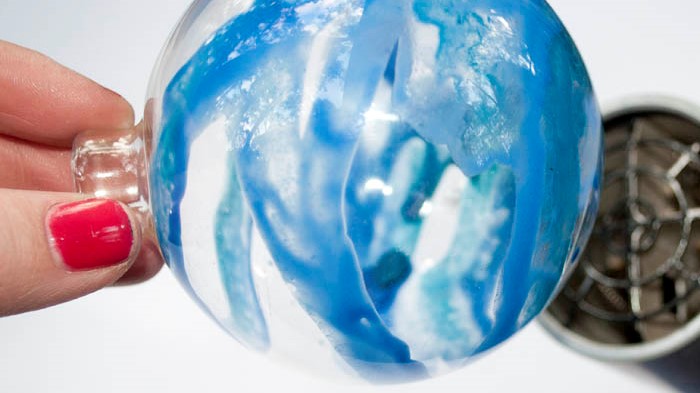
5.Slime Ornaments
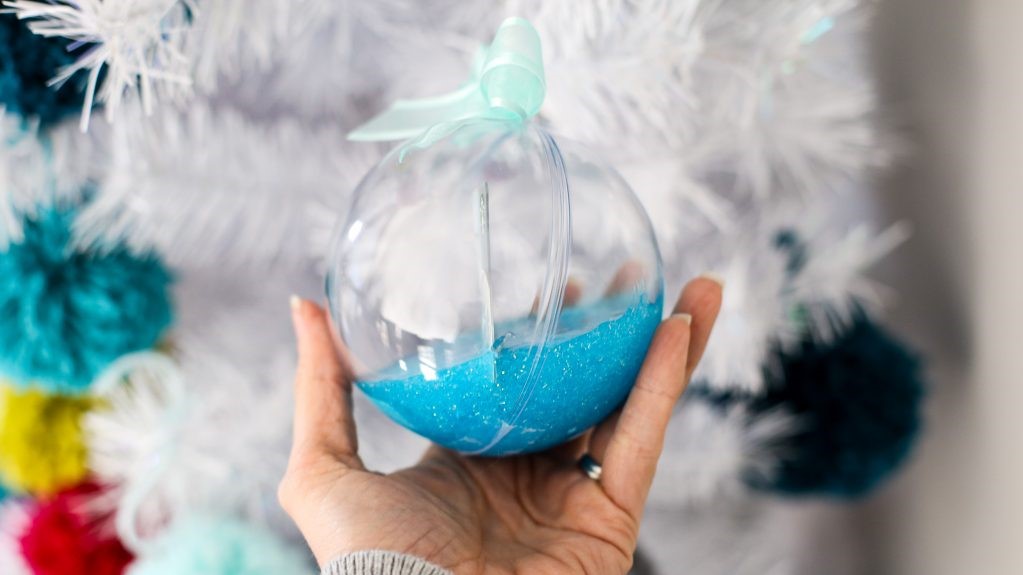
Kids will surely love making these slime ornaments! It’s a great activity to do together and for sensory play. Add some surprise inside the ornament to make this a great gift for your kid’s friends. You will need:
- Clear ornament balls
- Glue
- Liquid starch
- Food coloring
- Glitter (optional)
- Toy or tiny surprise (Optional)
First, start by adding glue to the clear ornament ball. Then, add a few drops of food coloring. Once you’re happy with the color, add in the liquid starch. Mix everything together until it’s fully combined. Your slime is now ready! (You can also follow this all-natural, scented slime recipe for kids.)
Then, fill one side of the ornament with slime and add a toy or some surprise, close the ornament, hang, and enjoy!
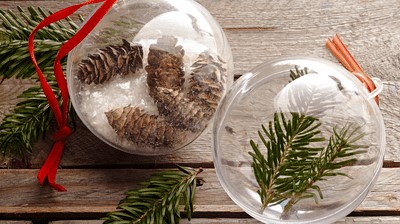
6.Snow Globe Ornaments
Instead of typical snow globes, make these easy-to-make waterless snow globe ornaments instead. You can customize what to put inside and make this ornament something your kid can call his or her own. You will need:
- Large clear ornament
- A small figurine or toy
- Fake snow
First, remove the top of the ornament. Next, add a layer of fake snow to the bottom of the ornament. Then, glue your figurine or toy onto the fake snow. Finally, place the top of the ornament and screw it closed. You can also draw something on the ornament, put in some glitter, etc. That’s it! Your waterless snow globe ornament is ready to hang and enjoy.
7.Snowman CD Ornaments
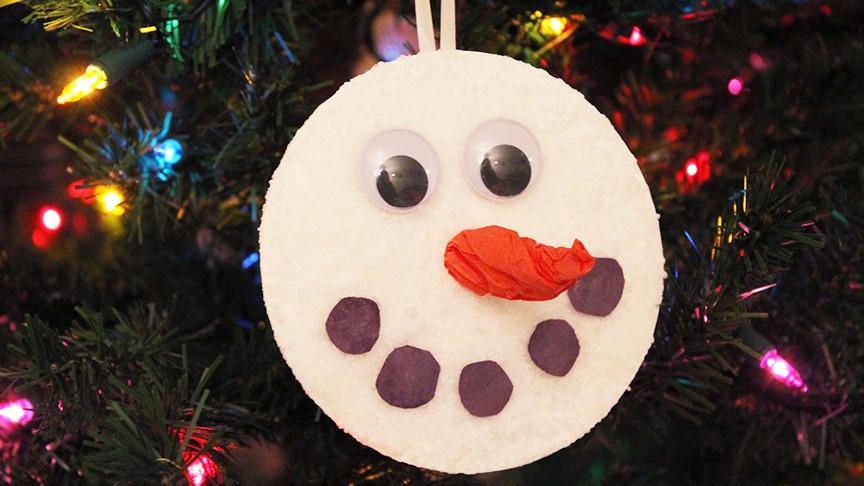
Another cute and easy-to-make Christmas ornament for kids is these Snowman CD ornaments. You will need:
- An old CD
- White paint
- Googly eyes
- Black paper
- Orange paper
- Glue gun
- Glitter (optional)
First, paint the CD white and sprinkle glitter if you want. Let it dry. Then, cut small black circles and paste them into the snowman’s mouth. For the nose, roll a small piece out of the orange paper and insert it into the CD’s hole. Finally, glue on the googly eyes. That’s it!
8.Bottlecap Snowman Ornaments
We can never get enough of snowmen, and we know kids love them too! This Christmas ornament is also a great way to recycle those old bottlecaps. You will need:
- Bottlecaps
- White paint
- Glue gun
- Ribbon or string
- Black and orange sharpie marker or paint
First, paint the bottlecaps white. Once they’re dry, glue 3 bottlecaps together in a snowman shape. Then, use the black Sharpie or paint to add on a mouth, eyes, and buttons and the orange one for the nose. Add a ribbon as its scarf and another piece of ribbon or string to create a loop for hanging and glue it on the back of the snowman’s head.
9.Baked Cinnamon Ornaments

These ornaments smell as good as they look! They’re also a fun Christmas activity to do with kids since it doesn’t require too many steps or materials. You will need:
- Cinnamon powder
- Applesauce
- Plastic Christmas cookie cutters
- String or ribbon
- Essential oils
First, mix the cinnamon powder and applesauce until you achieve a sticky dough that holds its shape. Then, use the cookie cutters to make different Christmas shapes out of the dough. Make a hole at the top of each ornament using a straw and then string a ribbon or piece of string through it. Let them dry in a warm 200° oven for a few hours, or you can leave them overnight. Decorate accordingly and add some essential oils.
10.Peppermint Candy Ornaments
These classic edible ornaments are not only fun and festive, but they smell great and taste great too! You will need:
- Peppermint candies
- Cookie cutters
- Non-stick cooking spray
- Parchment paper
- Toothpick or skewer
- String or ribbon
To make these ornaments, start by spraying your cookie cutters with non-stick cooking spray. Then, line a baking sheet with parchment paper and place the peppermint candies in the cookie cutter. Place the baking sheet in the oven at 200° for about 15 minutes, or until the candy is melted. Once they are melted, use a toothpick or skewer to make a hole at the top of the ornament. Allow to cool completely before removing from the cookie cutter. Once they are cooled, add string or ribbon and hang them on your tree!
11.Melted Crayon Ornaments
I super love how these ornaments look! They look festive and elegant. Surely, kids will be so proud to show your guests the ornaments they made. You will need:
- Crayons
- Glass ornaments
- Hair dryer
First, make crayon shaving using peelers or scissors. Put the crayon shavings into the ornament make sure to use different colors per piece. Heat the ornament using a hair dryer, and be careful not to overheat it. The heat will make the crayon shavings inside the ornament melt and create a beautiful design. Rotate the ornament to make sure every part is colored.
12.Popsicle Santa Hats
This is one of the cutest ornaments I’ve ever seen! Not to mention, it’s so easy to make that even our preschoolers will get excited about it. You will need:
- Popsicles
- Paint
- Glue
- Cotton Balls
- String
First, glue three popsicle sticks to form a triangle. Then, paint the triangle red. Once the paint is dry, glue cotton balls on the bottom and on the tip of the triangle. Finally, cut a small piece of string and glue it to the back of the ornament so you can hang it on your tree.
13.Nature-Scented Ornaments
These spice-scented ornaments will give a rustic and elegant touch to your tree. Little will your visitors know that your kids are the ones who made those. You will need:
- Clear glass ornaments
- Whole spices, dried citrus, figs, etc
- Essential oils
First, add some cinnamon sticks, anise stars, cloves, dried citrus, or figs to the glass ornament. Then, add a few drops of the spice or fruit’s equivalent essential oils. Then, screw on the top of the ornament and give it a little shake so that everything is mixed together. Hang on your tree and enjoy the festive scent!
14.Pompom Olaf Ornaments
This is a great ornament for Frozen fans! These pompom ornaments will surely make the cutest Olaf your kids will ever see. You will need:
- White pompoms
- Googly eyes
- Black and orange felt
First, glue three white pompoms together to form Olaf’s body. Then, glue on two google eyes. For the nose, cut a small triangle out of the orange felt and glue it in between the eyes. Finally, use the black felt to make two small dots for his mouth. Hang him on your tree and enjoy!
15.Dried Pasta Ornaments
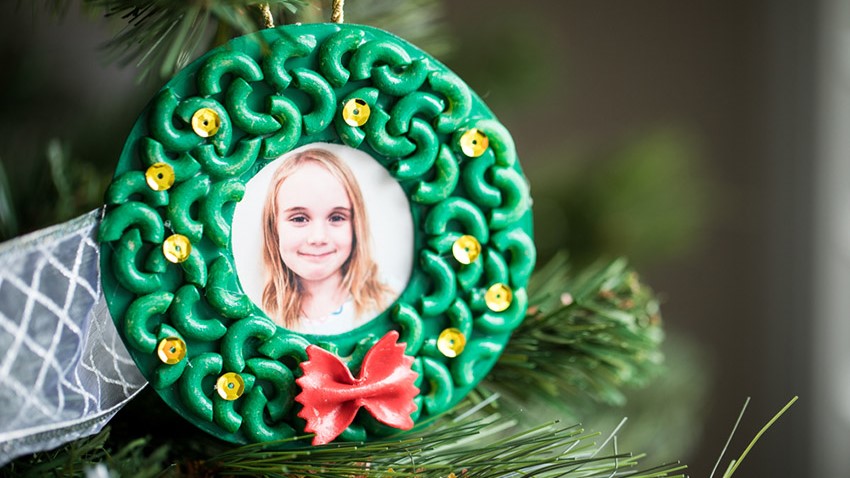
Dried pasta ornaments are one of my favorites. These unique ornaments look so beautiful. I can’t wait to tell everyone they’re made of pasta. You will need:
- Cardboard
- Different kinds of pasta
- Glue
- String or ribbon
- Metallic Paint
First, cut out a snowflake or any other shape you desire from the cardboard. Next, start gluing different pasta pieces to the cardboard. Once you’re done, paint the ornament with metallic paint. Finally, add a string or ribbon and hang it on your tree.
A New, Creative Tradition Awaits!
These are just some of the many fun and safe Christmas ornaments kids can make at home. With a little creativity, your child can make a Christmas ornament that is truly unique and special. So get creative and have fun! Merry Christmas!
What are some of your favorite Christmas ornaments? We’d love to hear about it on social media with @fromsimplyearth and in the comments below!
Are you ready to master essential oils? You get FREE access to our Hero Course if you subscribe to our Monthly Essential Oil Recipe Box. With it, you’ll receive 4 Pure Essential Oils, 6 Aromatherapist-Created Recipes, and FREE Essential Oil Recipe Supplies for Life—all delivered directly to your door each month for just $44.99/month. Plus, we’ll give you a FREE Big Bonus Box!
Don’t miss out on the all-natural fun that comes with the Recipe Box; get yours today: Subscribe now to learn how to use essential oils!